Windshield Replacement for Cadillac STS 2009
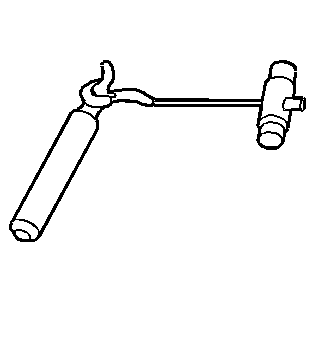
Special Tools
| • | J 24402-A
Glass Sealant Remover (Cold Knife) |
| • | J 39032
Stationary Glass Removal Tool |
| • | Use a urethane adhesive systems which meet GM Specification GM 3651G |
Removal Procedure
- Open the hood.
- Remove the windshield wiper arms. Refer to
Windshield Wiper Arm Replacement.
- Remove the air inlet grille. Refer to
Air Inlet Grille Panel Replacement.
- Remove the windshield side reveal moldings, if equipped. Refer to
Windshield Side Reveal Molding Replacement.
- Remove the rearview mirror. Refer to
Inside Rearview Mirror Replacement.
- Remove the outside moisture sensor if equipped.
- Remove the Vehicle Direction Alert Alarm Warning (VDAAW ) Module. If equipped. Refer to
Vehicle Direction Alert Alarm Warning Module Calibration.
- Remove the interior windshield garnish moldings. Refer to
Windshield Pillar Garnish Molding Replacement.
Warning: If broken glass falls into the defroster outlets, it can be blown into the passenger compartment and cause personal injury.
- Cover the following parts to protect from broken glass:
| • | Defroster outlets and A/C outlets |
- Apply a double layer of masking tape around the perimeter of the painted surfaces and the interior trim.
Warning: Refer to Glass and Sheet Metal Handling Warning in the Preface section.
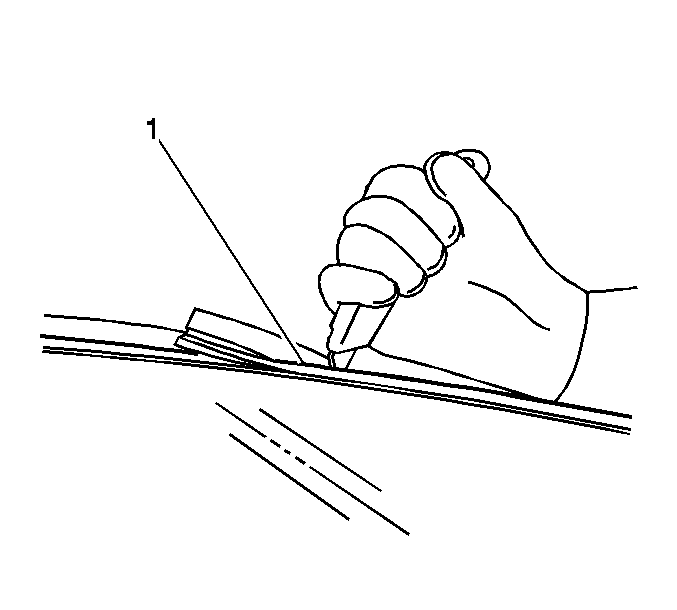
Note: Use care not to damage the paint on the roof or pinchweld with the utility knife when cutting the lace loose from the window.
- Using a utility knife, carefully cut the upper flap (1) of the windshield lace in order to access the urethane adhesive bead.
| • | The upper windshield lace is a one-piece molding and fills the cavities between the body and windshield. |
| • | The windshield lace cannot be reused if stretched or damaged. It must be replaced. |
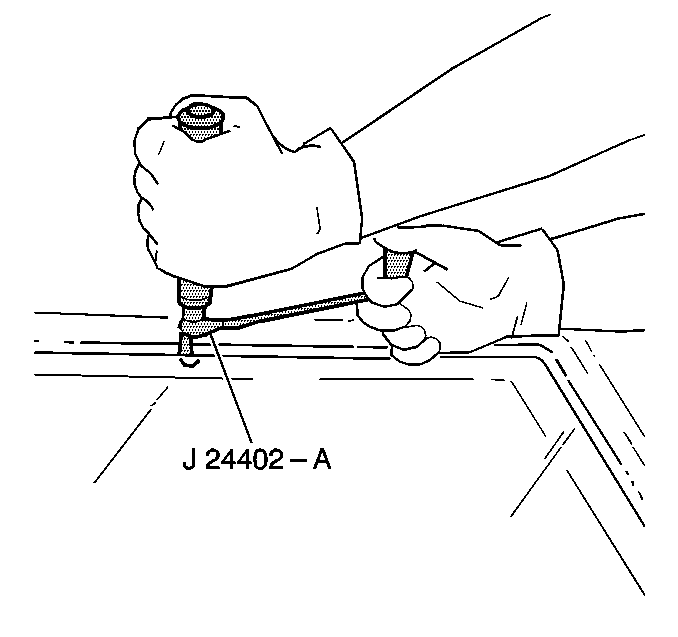
Note: Keep the cutting edge of the tool against the window.
- Separate the urethane adhesive from the window.
| • | Leave approximately 2 mm (3/64 in) of the existing bead of urethane adhesive from the pinch-weld flange. |
| • | The only suitable lubrication is clean water. |
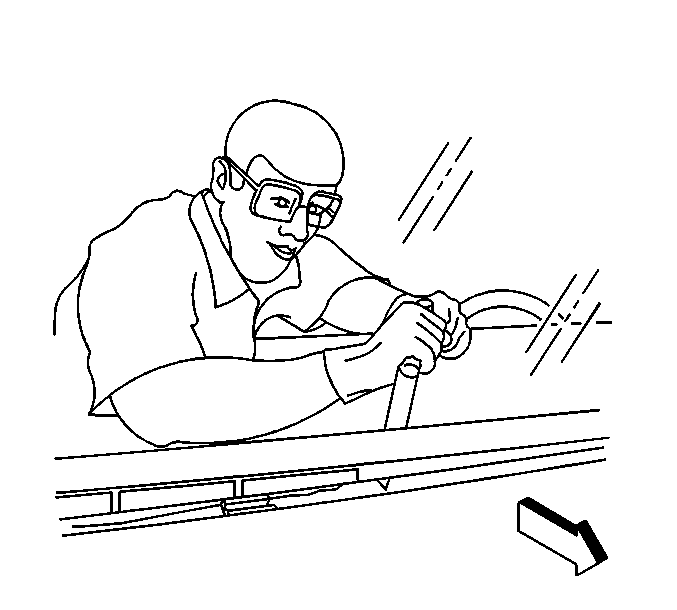
- Remove the bottom of the window from the urethane adhesive using a long utility knife or similar tool. Keep the cutting edge of the utility knife against
the window. Do this from inside the vehicle.
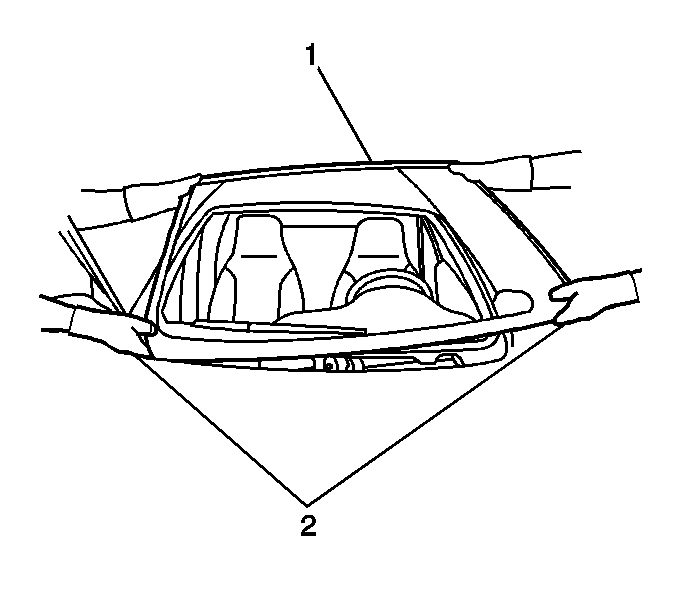
- With the aid of an assistant, remove the windshield (1) from the vehicle.
Installation Procedure
- Install a stationary window into the opening. Refer to
Adhesive Installation of Stationary Windows.
- Install the windshield side reveal moldings, if equipped. Refer to
Windshield Side Reveal Molding Replacement.
- Install the outside moisture sensor if equipped.
- Install the VDAAW module. If equipped. Refer to
Vehicle Direction Alert Alarm Warning Module Calibration.
- Install the rearview mirror. Refer to
Inside Rearview Mirror Replacement.
- Install the interior windshield garnish moldings. Refer to
Windshield Pillar Garnish Molding Replacement.
- Install the air inlet grille. Refer to
Air Inlet Grille Panel Replacement.
- Install the windshield wipers arms. Refer to
Windshield Wiper Arm Replacement.
- Remove the double layer of masking tape around the perimeter of the painted surfaces and the interior trim.
- Close the hood.