Powertrain Control Module Replacement for Cadillac Seville 2004
Removal Procedure
Notice: Turn the ignition OFF when installing or removing the PCM connectors and disconnecting or reconnecting the power to the PCM (battery cable, PCM pigtail, PCM fuse, jumper cables, etc.) in order to prevent internal PCM damage.
- Using a scan tool, retrieve the percentage of remaining engine oil and the remaining automatic transmission fluid life. Record the remaining engine oil and the remaining automatic transmission fluid life.
- Turn OFF the ignition.
- Disconnect the battery negative cable. Refer to Battery Negative Cable Disconnection and Connection in Engine Electrical.
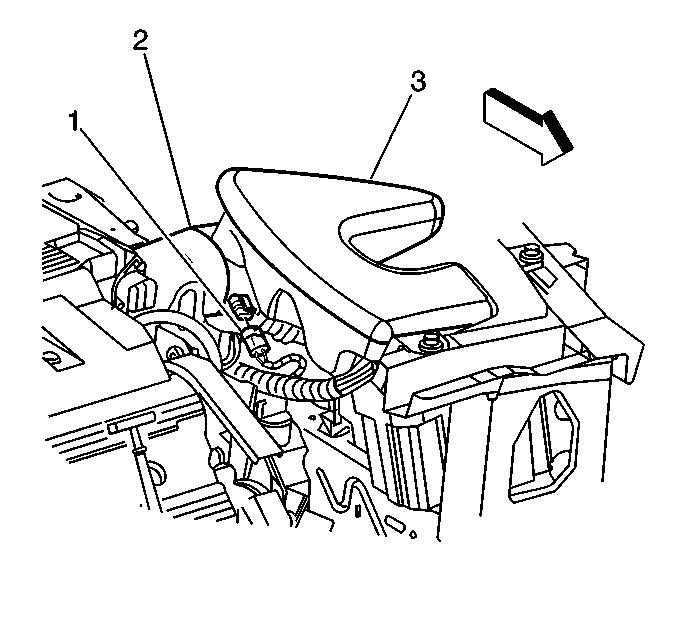
- Remove the screw retaining the intake air duct/resonator (3) to the PCM housing.
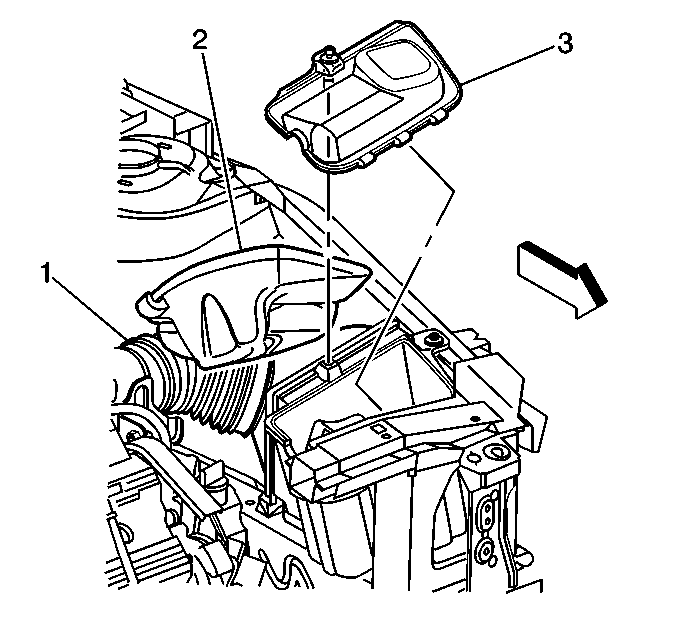
- Unsnap the air filter housing clamps on top of the air cleaner housing assembly.
- Pull the intake air duct/resonator assembly (2) up enough to remove the air cleaner cover (3) and the PCM.
- Slide the air cleaner element assembly toward the fender to separate the air cleaner element assembly from the air inlet assembly.
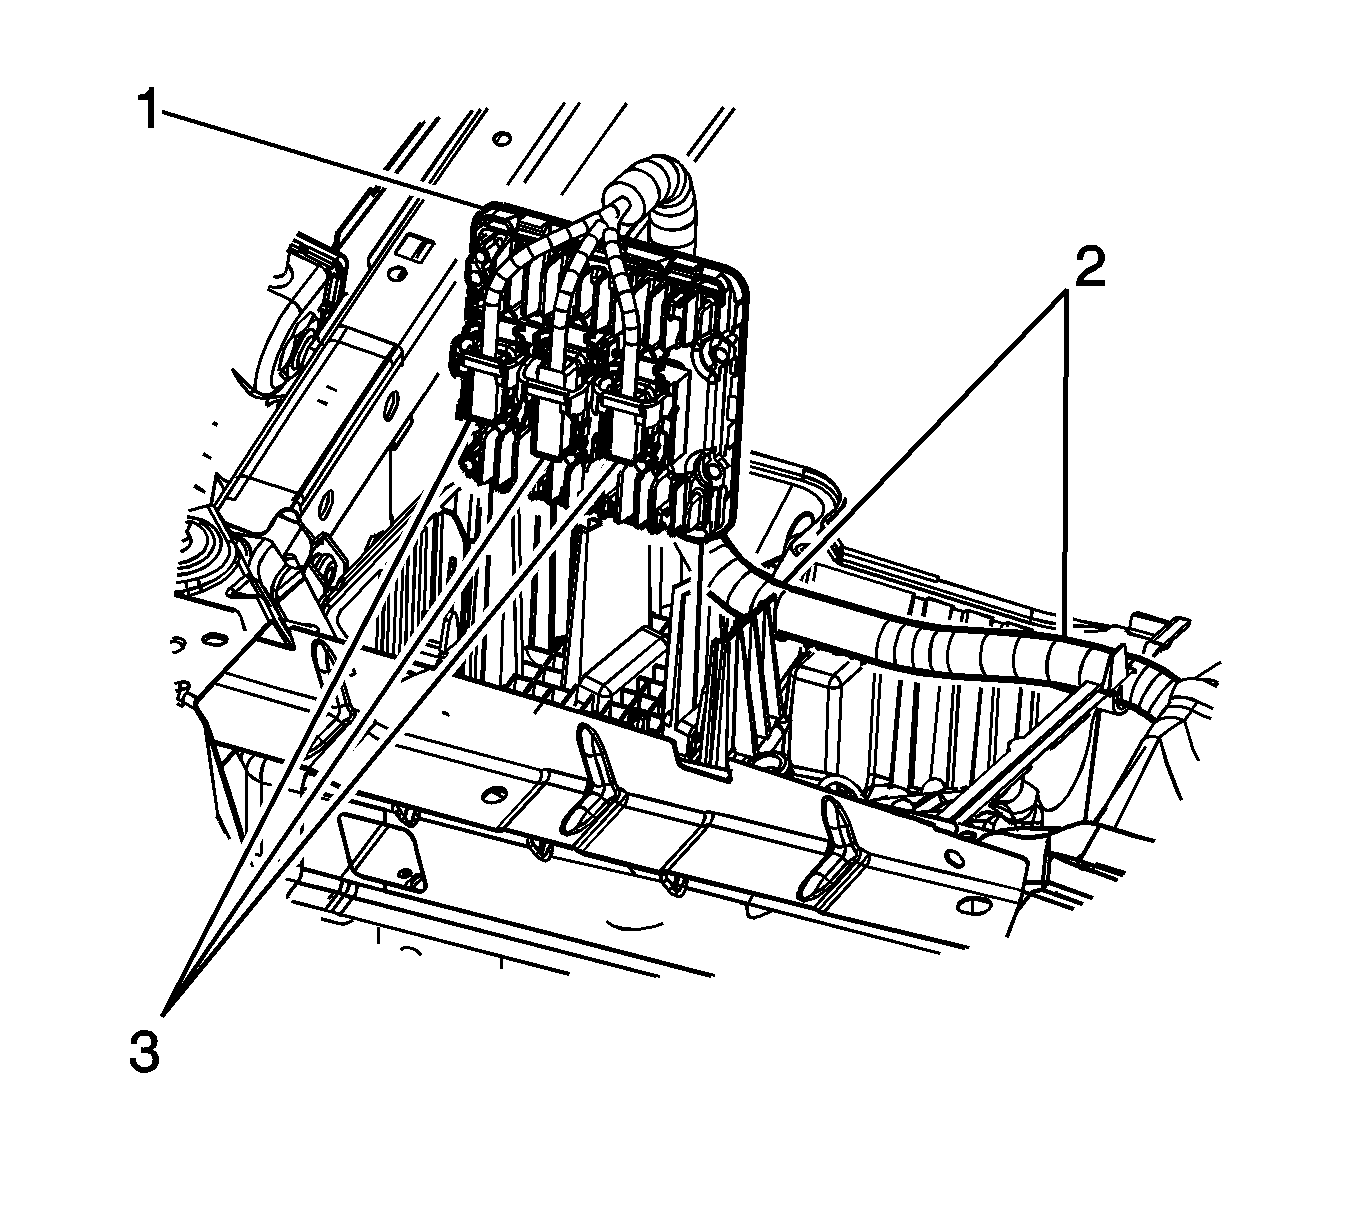
- Partially remove the PCM (1) from the housing.
- Release the connector locks and disconnect the PCM electrical connectors (3).
- Remove the PCM (1).
Important: It is necessary to record the remaining engine oil life. If the replacement module is not programed with the remaining engine oil life, the engine oil life will default to 100%. If the replacement module is not programmed with the remaining engine oil life, the engine oil will need to be changed at 5000 km (3,000 mi) from the last engine oil change.
Important: It is necessary to record the remaining automatic transmission fluid life. If the replacement module is not programed with the remaining automatic transmission fluid life, the automatic transmission fluid life will default to 100%. If the replacement module is not programmed with the remaining automatic transmission fluid life, the automatic transmission fluid will need to be changed at 83000 km (50,000 mi) from the last automatic transmission fluid change.
Installation Procedure
Important: If the PCM is being programmed using the Off-Board method, perform the programming before continuing with the steps listed below. Refer to the Off-Board procedure in Service Programming System (SPS) in Programming.
- Install the PCM connectors and locks.
- Install the PCM (1).
- Install the air cleaner cover (3) onto the air inlet housing.
- Snap the assembly clamps into place.
- Align the intake air duct/resonator assembly (3) into place.
- Install the screw onto the intake air duct/resonator assembly.
- Connect the battery negative cable. Refer to Battery Negative Cable Disconnection and Connection in Engine Electrical.
- Program the PCM. Refer to Service Programming System (SPS) in Programming.
Notice: Refer to Fastener Notice in the Preface section.
Tighten
Tighten the intake air duct clamp to 3 N·m
(27 lb in).
