For 1990-2009 cars only
Vacuum Hose Harness Replacement for Chevrolet Camaro 1998
Vacuum Hose Harness Replacement Jumper Harness
Removal Procedure
- It is not necessary to replace the entire vacuum harness if there is a localized leakage or collapse in the vacuum hose.
- Remove the HVAC control. Refer to Control Assembly Replacement .
- Open the I/P compartment.
- Disconnect the vacuum harness connector from the vacuum selector valve.
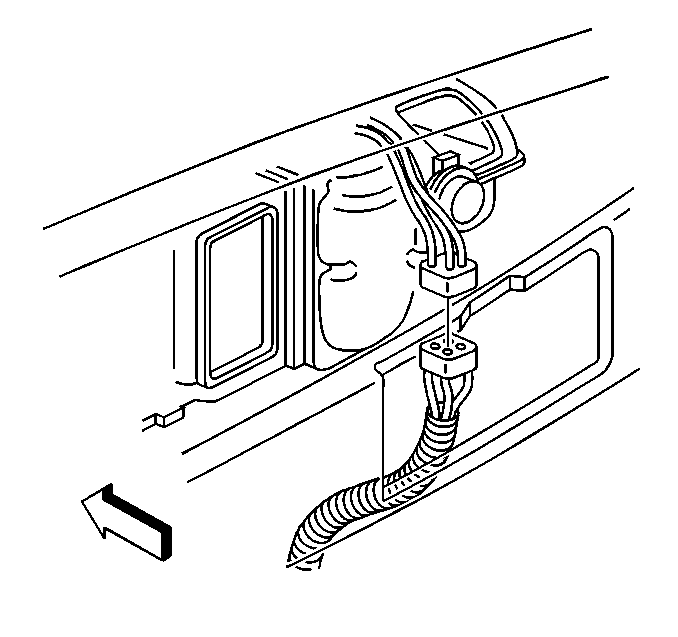
- Disconnect the vacuum harness jumper from the main harness connector.
If there is a localized leak or collapse in the vacuum hose, repair the vacuum hose:
| 1.1. | Cut the vacuum hose. |
| 1.2. | Insert a plastic retainer into the vacuum hose. |
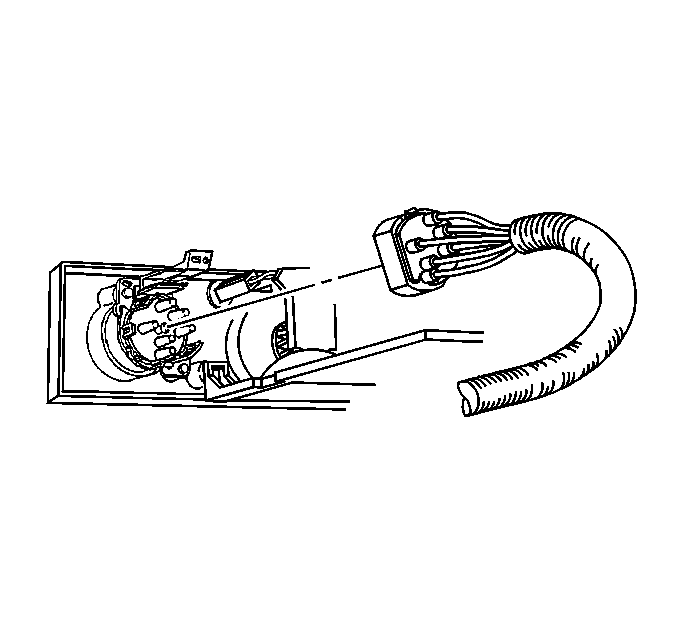
Push in on both sides of the IP compartment. This will cause the I/P compartment to drop open completely to allow access to the vacuum harness.
Installation Procedure
- Connect the vacuum harness jumper to the main harness connector.
- Connect the vacuum harness connector to the vacuum selector valve.
- Close the I/P compartment.
- Install the HVAC control. Refer to Control Assembly Replacement .
Vacuum Hose Harness Replacement Main Harness
Removal Procedure
- Remove the I/P carrier. Refer to Instrument Panel Carrier Replacement .
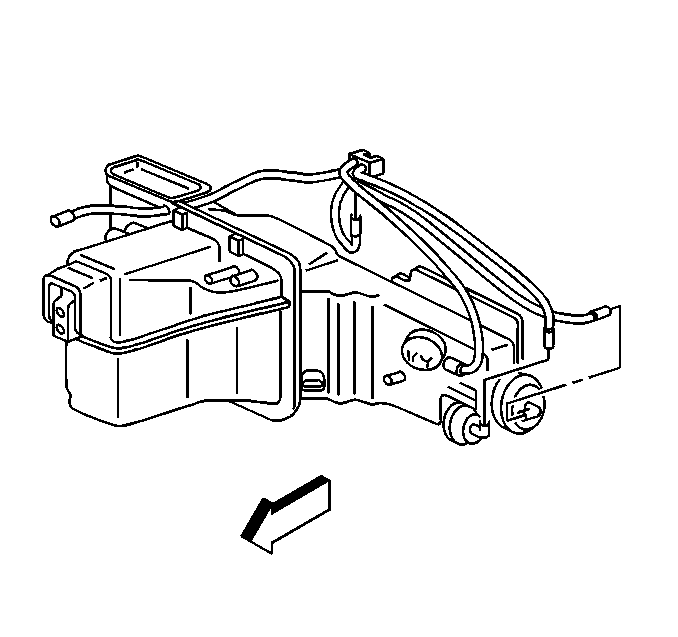
- Disconnect the vacuum hoses from the actuators.
- Remove the vacuum harness.
Installation Procedure
- Install the vacuum harness.
- Connect the vacuum hoses to the actuators.
- Install the I/P carrier. Refer to Instrument Panel Carrier Replacement .
