For 1990-2009 cars only
Stabilizer Shaft Replacement for Chevrolet Spark 2005
Removal Procedure
- Raise and suitably support the vehicle. Refer to Lifting and Jacking the Vehicle in General Information.
- Remove the front wheel. Refer to Tire and Wheel Removal and Installation in Tires and Wheels.
- Remove the transaxle under cover. Refer to Transmission Replacement in Manual Transmission - Y4M, or Transmission Replacement .
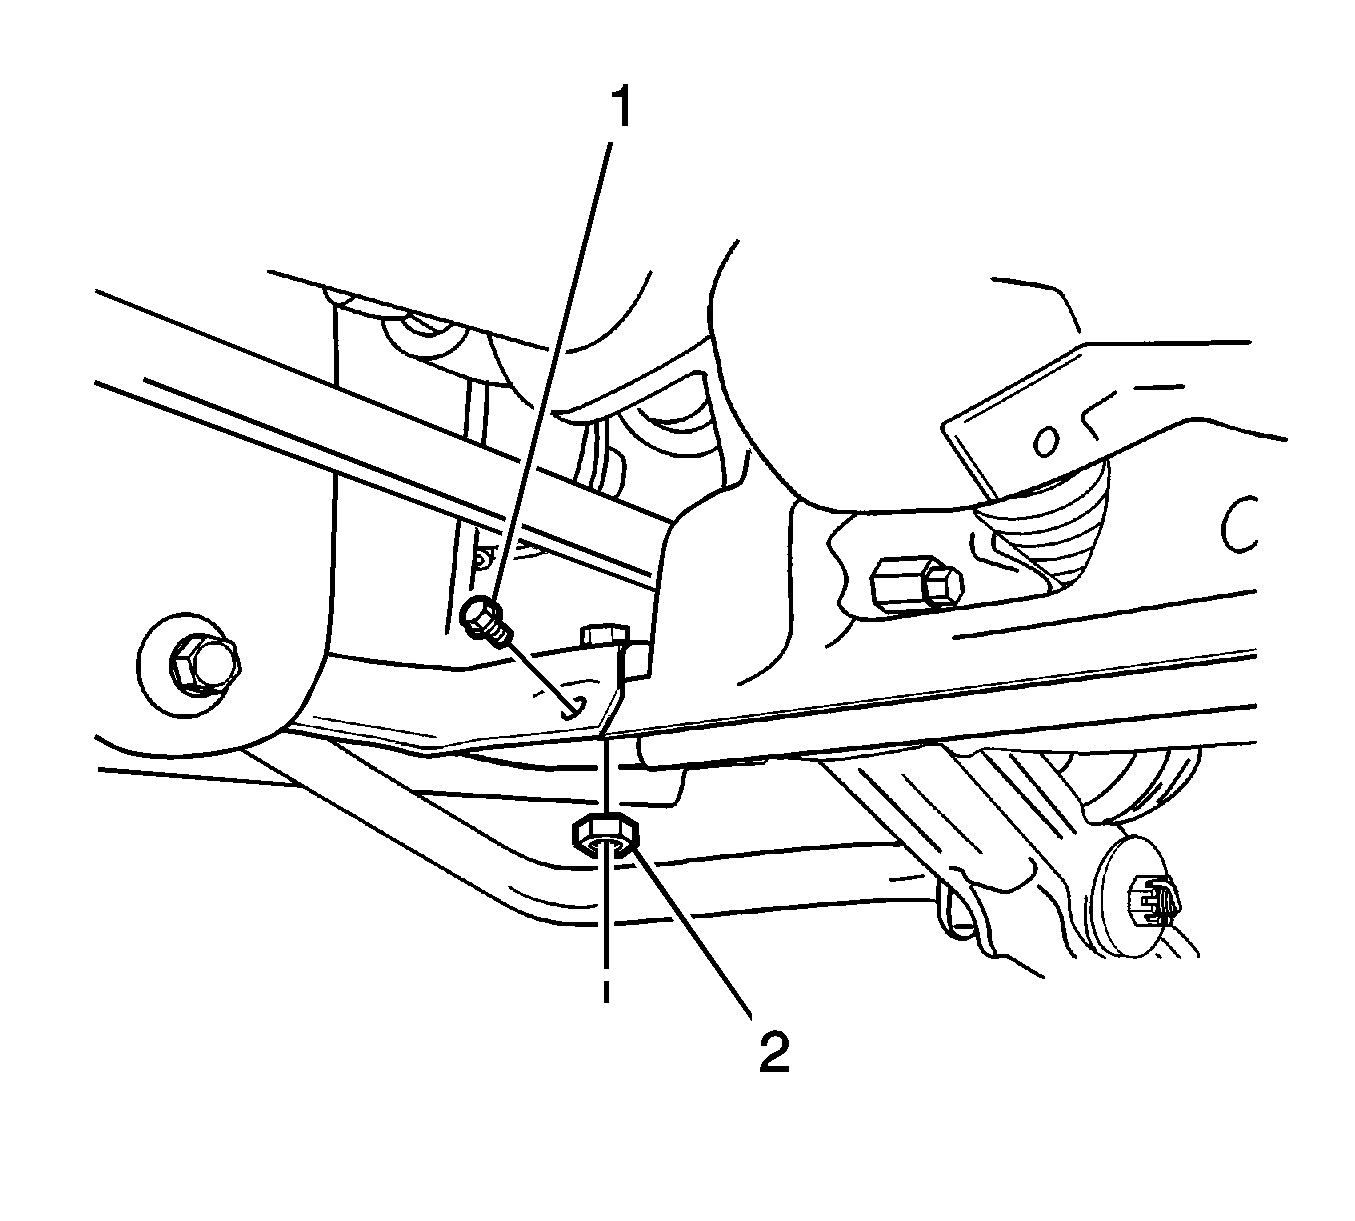
- Remove the front under longitudinal frame bolt (1).
- Remove the front under longitudinal frame nut (2).
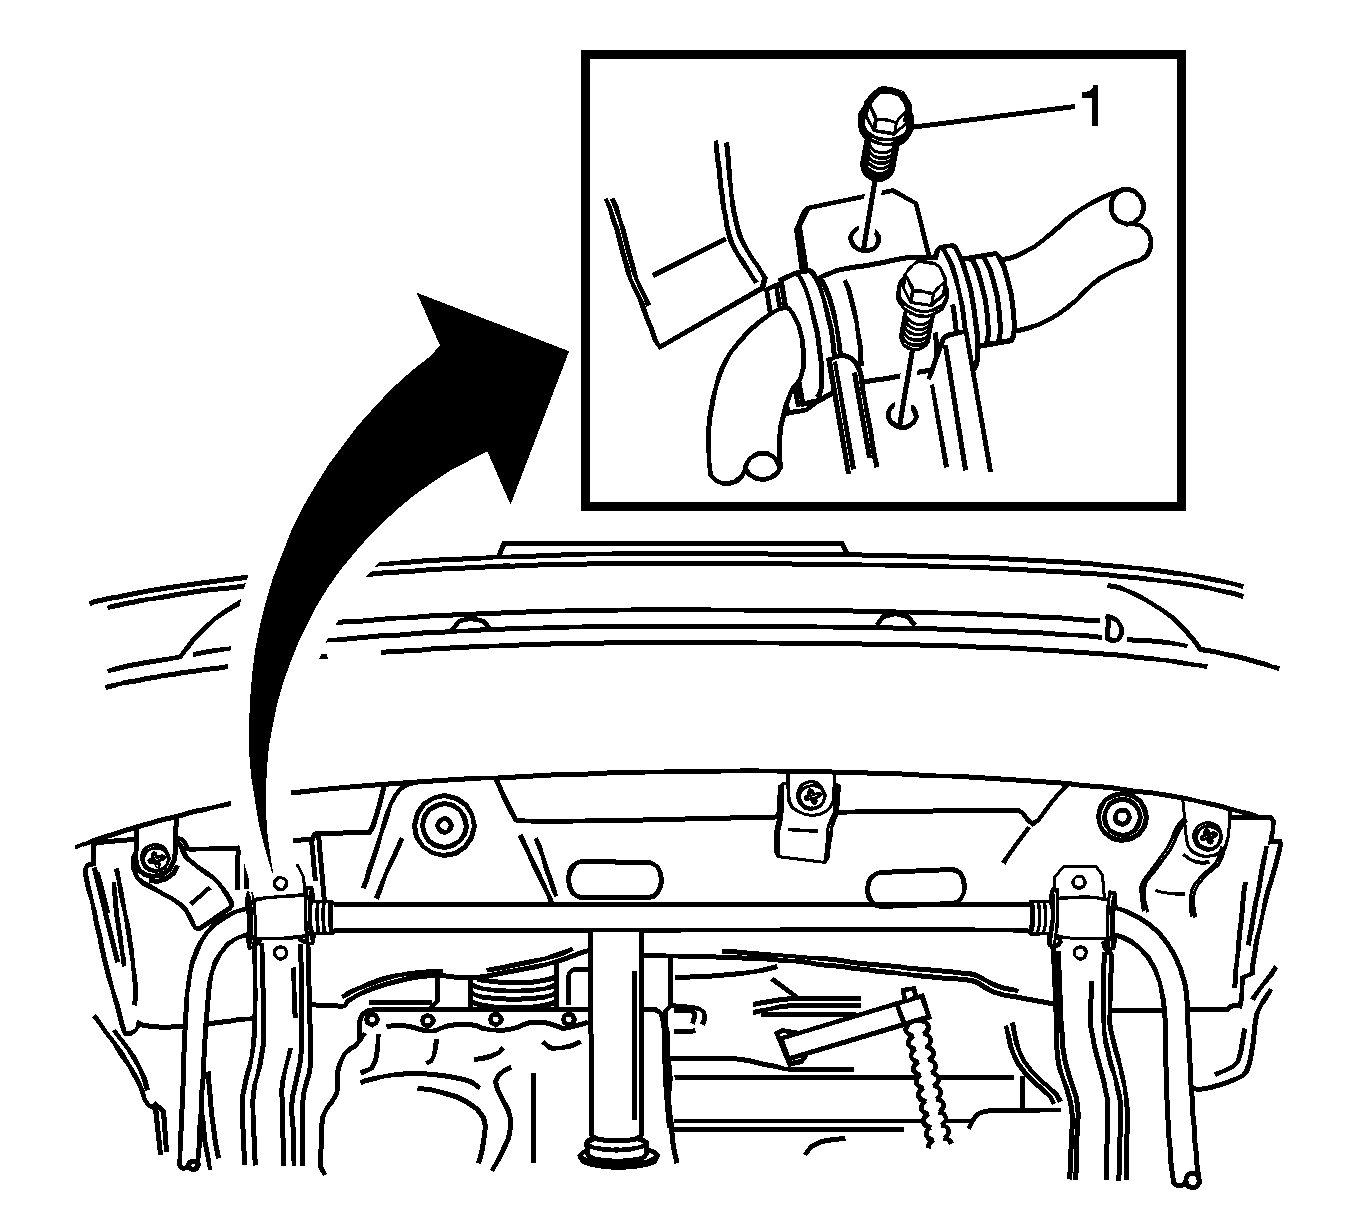
- Remove the stabilizer shaft mounting bolts (1).
- Remove the front under longitudinal frame.
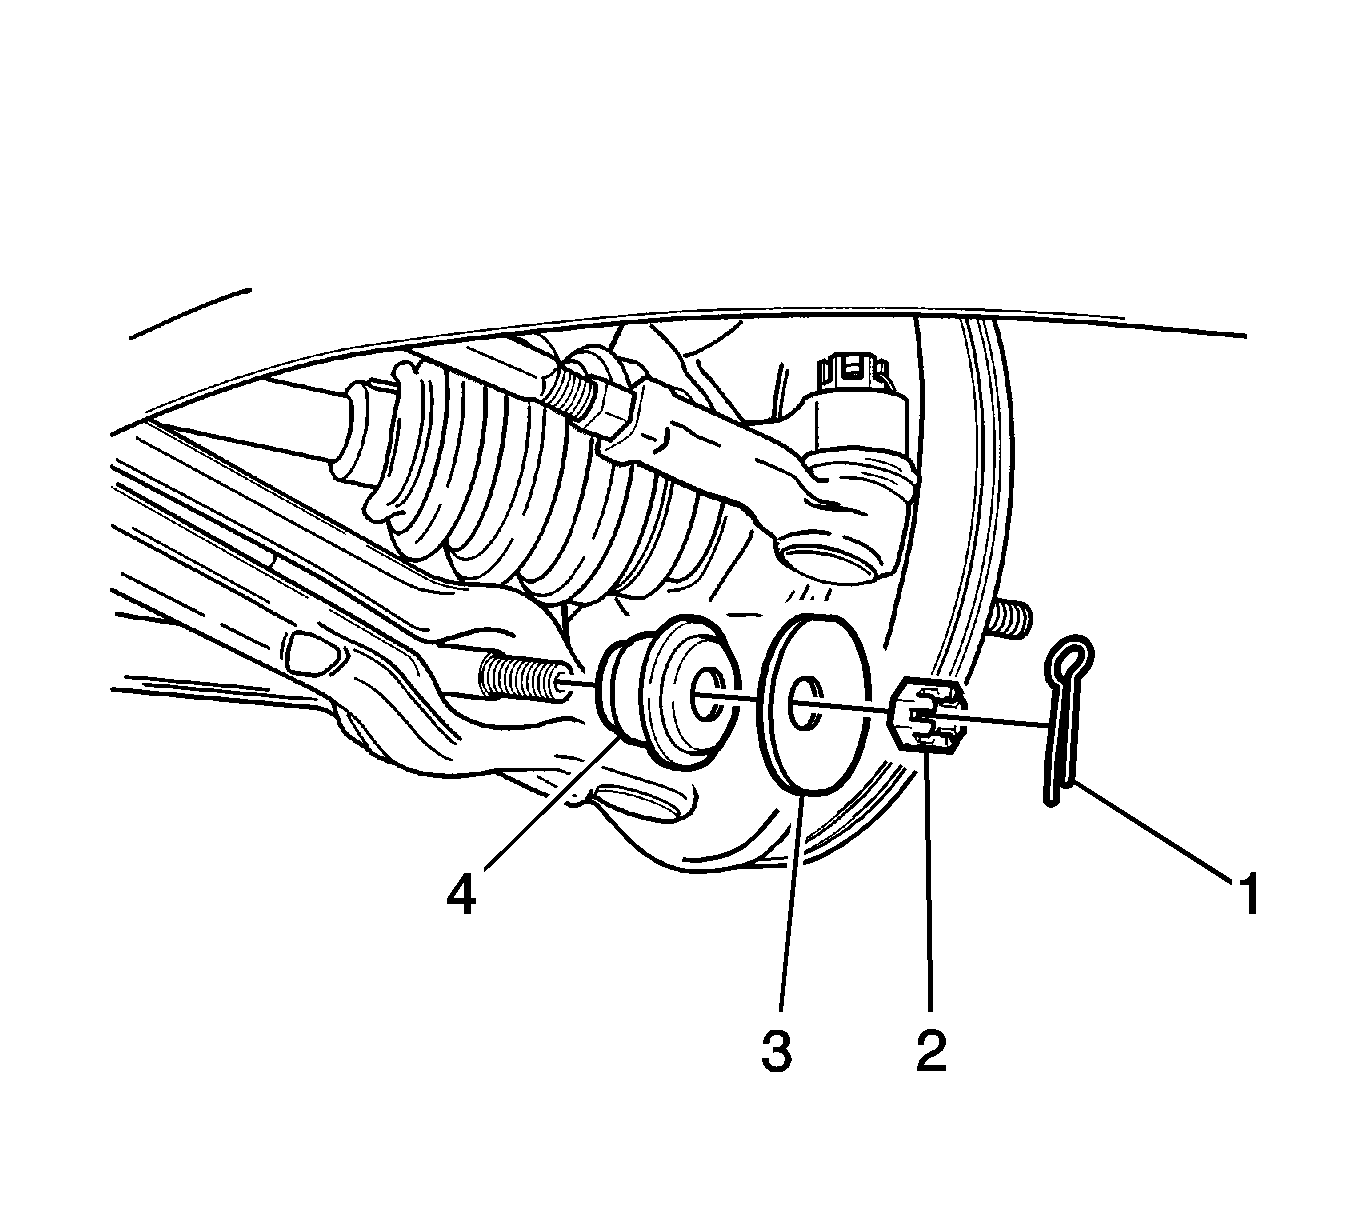
- Remove the cotter pin (1).
- Remove the castellated nut (2).
- Remove the washer (3).
- Remove the rear bushing by separating the stabilizer shaft from the control arm (4).
- Remove the stabilizer shaft from the vehicle.
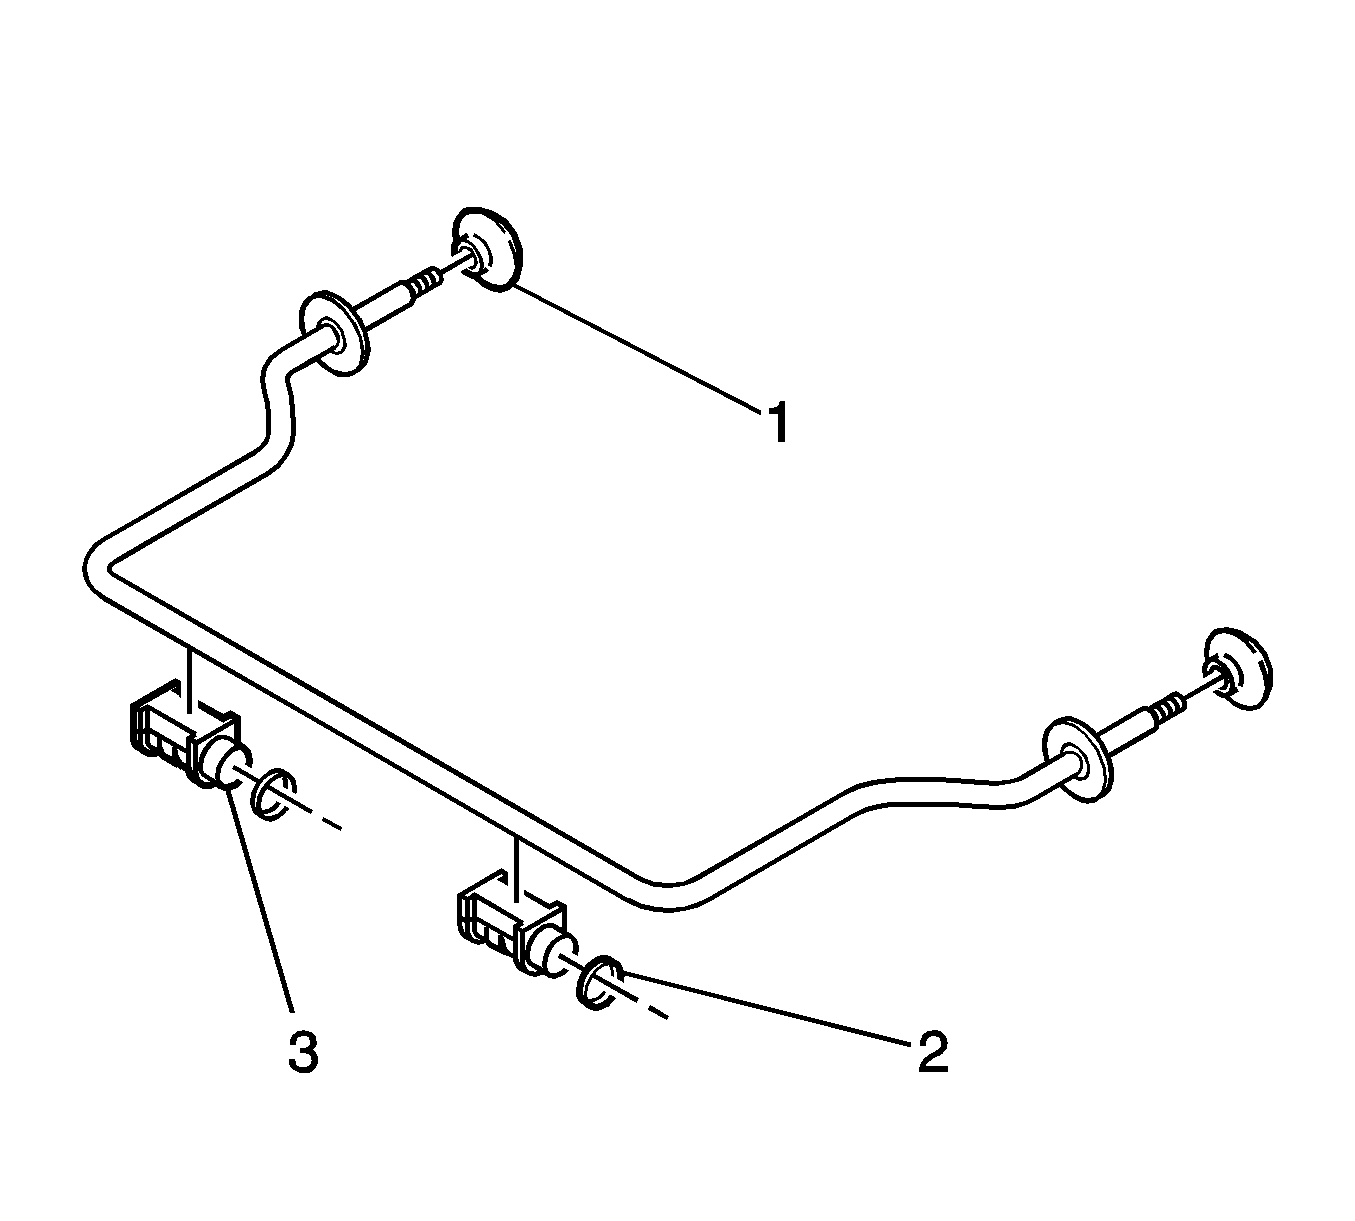
- Remove the bushing (1).
- Remove the wire clamps (2).
- Remove the mountings (3).
Notice: Refer to Vehicle Lifting and Jacking Notice in the Preface section.
Installation Procedure
- Install the mountings (3), wire clamps (2), and bushing (1).
- Install the stabilizer shaft to the vehicle and tighten the castellated nut (1).
- Install the cotter pin.
- Install the front under longitudinal frame.
- Install the stabilizer shaft mounting bolts (1).
- Install the front under longitudinal frame bolt (1).
- Install the front under longitudinal frame nut (2).
- Install the transaxle under cover. Refer to Transmission Replacement in Manual Transmission - Y4M.
- Install the front wheel. Refer to Tire and Wheel Removal and Installation in Tires and Wheels.
- Lower the vehicle.
Important: When installing the mountings, position the opened mountings forward.
Notice: Refer to Fastener Notice in the Preface section.
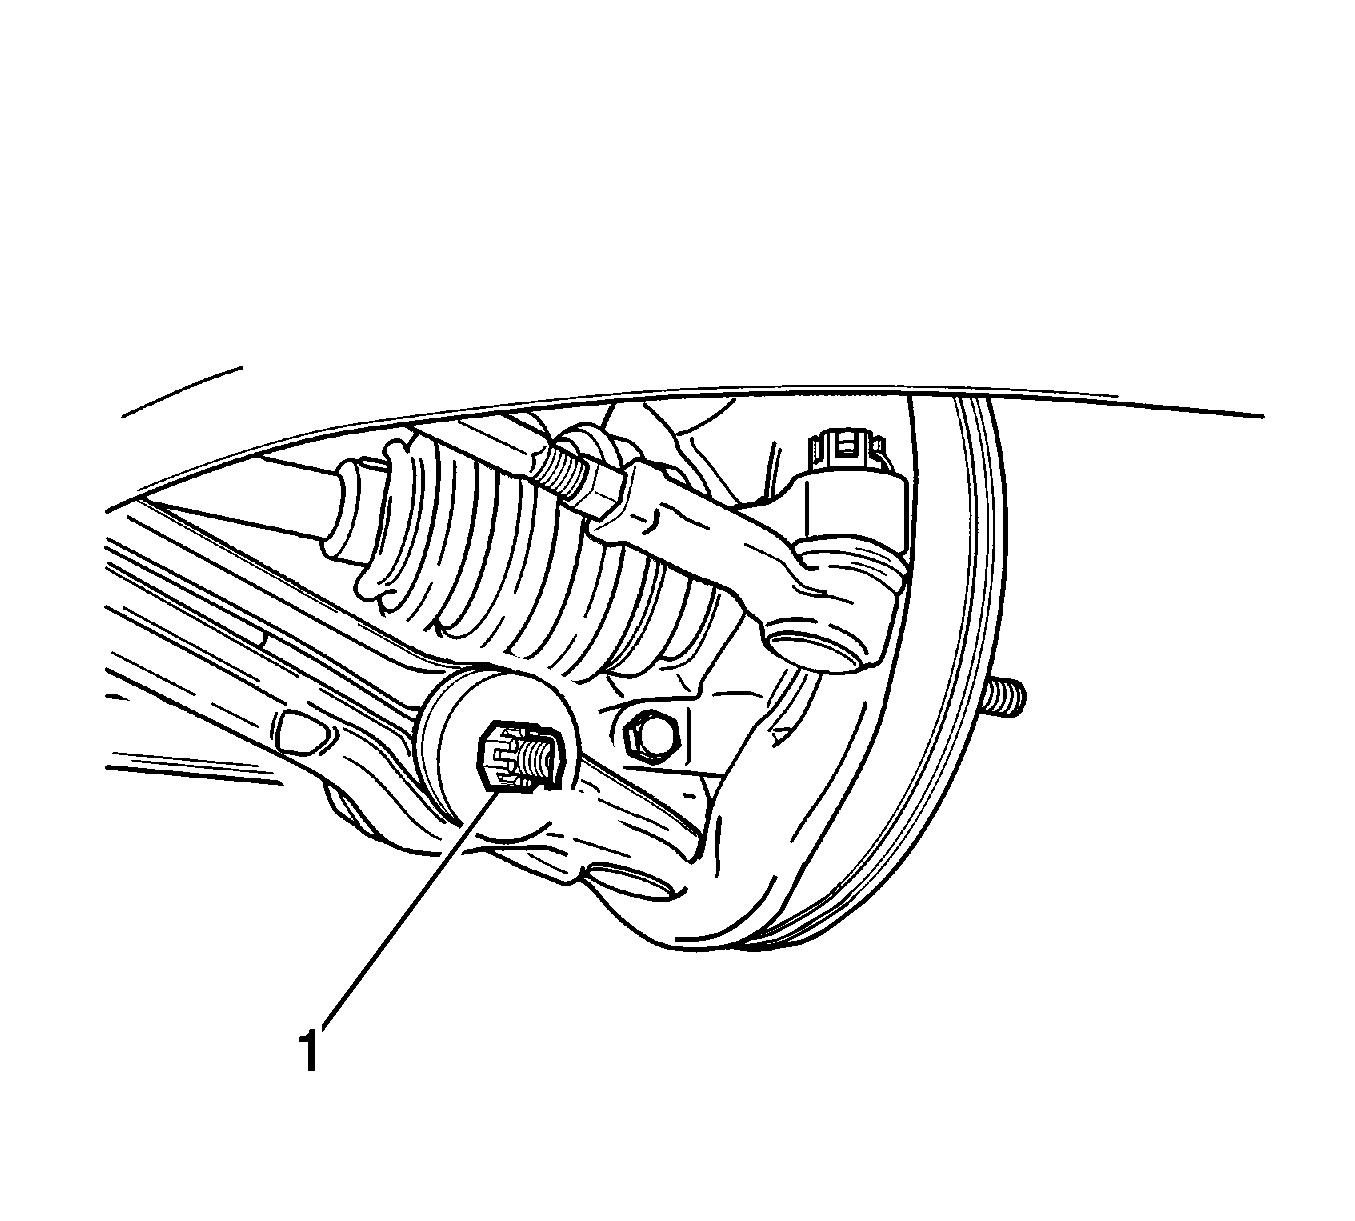
Tighten
Tighten the stabilizer shaft-to-body castellated
nut to 40-50 N·m (30-36 lb ft).
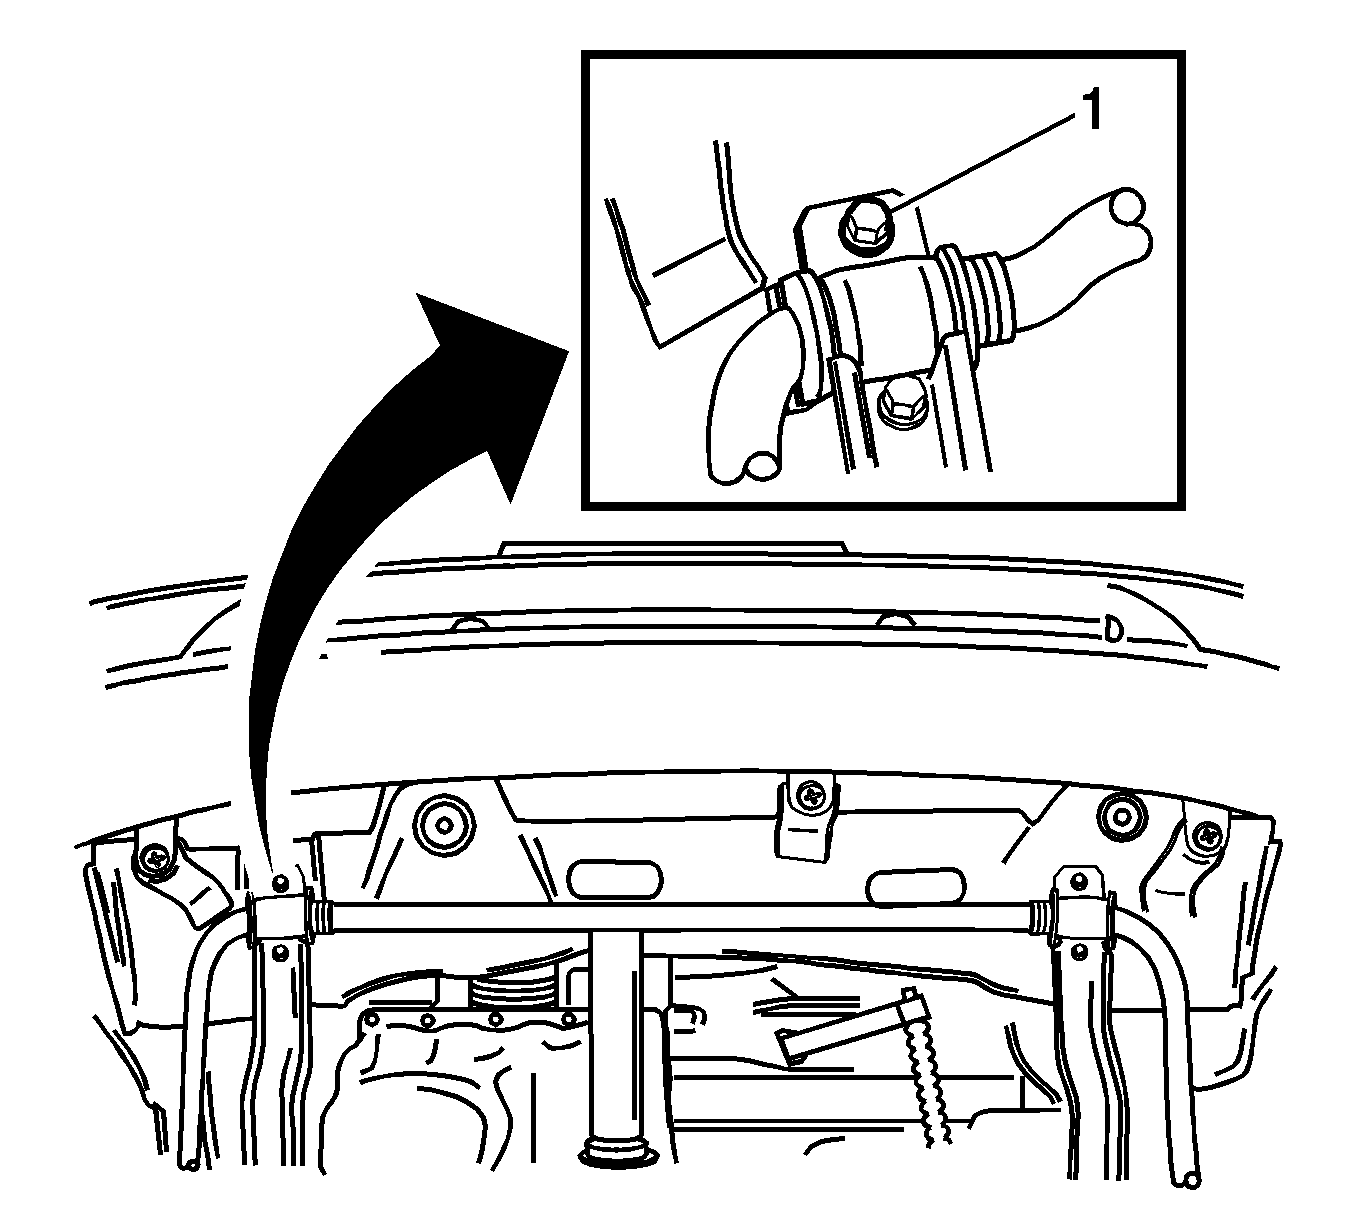
Tighten
Tighten the mounting bolts to 30-50 N·m
(22-36 lb ft).
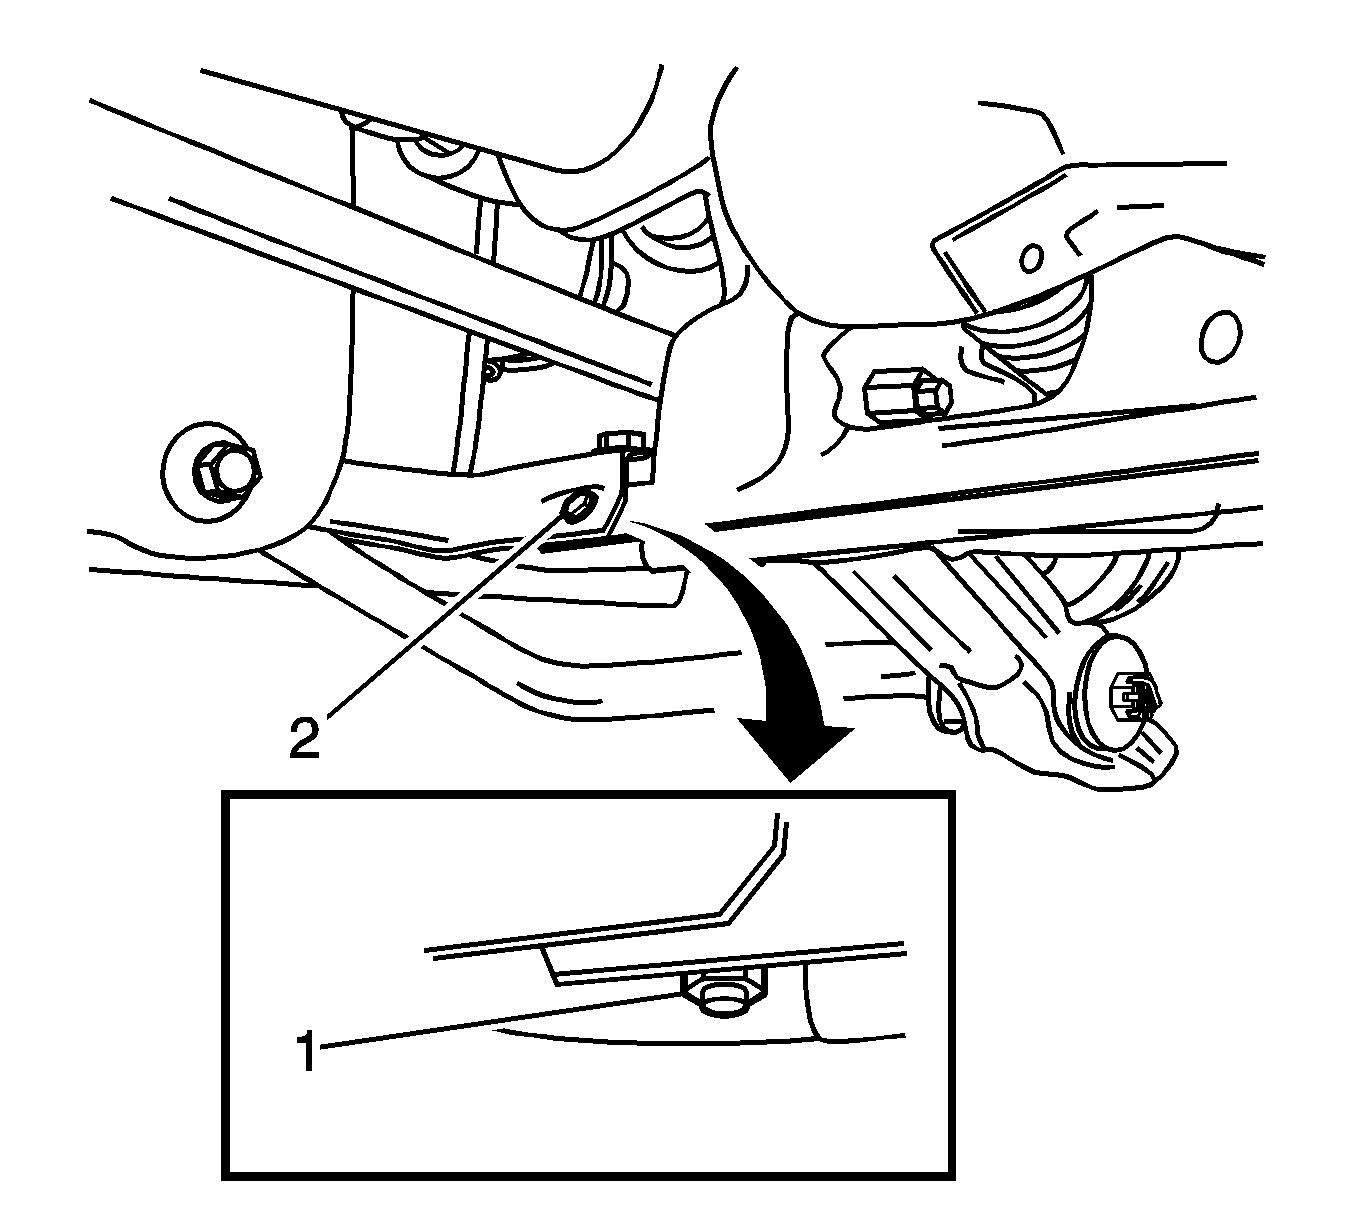
Tighten
Tighten the bolt to 10-14 N·m
(89-124 lb in).
Tighten
Tighten the nut to 65-80 N·m
(48-59 lb ft).
