For 1990-2009 cars only
Lower Control Arm Bracket Replacement for Chevrolet TrailBlazer - 2WD 2008
Removal Procedure
- Raise and support the vehicle. Refer to Lifting and Jacking the Vehicle .
- Remove the tire and wheel. Refer to Tire and Wheel Removal and Installation .
- Remove the stabilizer shaft link from the lower control arm. Refer to Stabilizer Shaft Link Replacement.
- Remove the lower control arm from the bracket. Refer to Lower Control Arm Replacement.
- Remove the lower control arm bracket from the vehicle.
Important: In the following step, it is NOT necessary to completely remove the lower control arm from the vehicle. Allow the lower control arm to remain attached to the knuckle assembly.
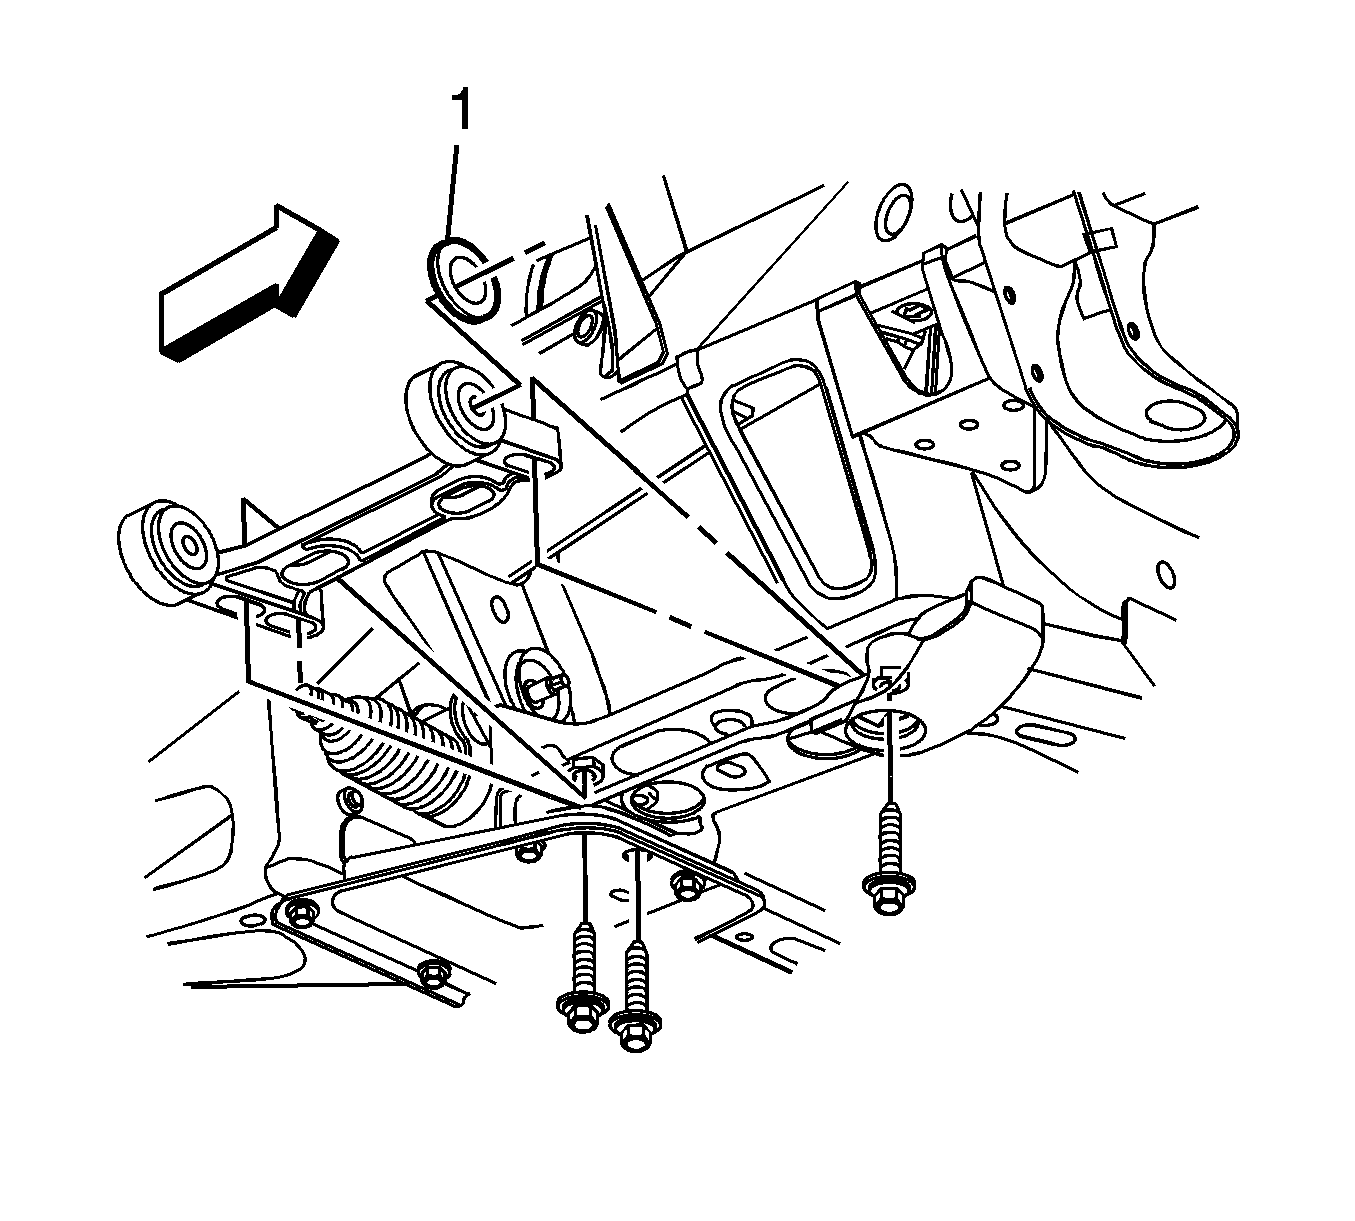
Important: Note the position of the spacer (1) on the front bushing.
Installation Procedure
- Install the lower control arm bracket to the vehicle.
- Install the lower control arm bracket mounting bolts to the frame.
- Install the lower control arm to the lower control arm bracket. Refer to Lower Control Arm Replacement.
- Install the stabilizer shaft link to the lower control arm. Refer to Stabilizer Shaft Link Replacement.
- Install the tire and wheel. Refer to Tire and Wheel Removal and Installation.
- Lower the vehicle.
- Inspect the front wheel alignment. Refer to Wheel Alignment Specifications.
Important: Ensure the spacer (1) is in the proper position on the front bushing.
Notice: Refer to Fastener Notice in the Preface section.
Tighten
| • | Tighten the front lower control arm bracket mounting bolt to 260 N·m (192 lb ft). |
| • | Tighten the rear lower control arm bracket mounting bolts to 230 N·m (170 lb ft). |
